Showing posts with label homemade. Show all posts

Monday, February 25, 2013

Making fitted cloth diapers

I made my first fitted diaper today using an old prefold I already had but never use anymore. I think it turned out great, and I cannot wait to use it! It seems a bit smaller than I would have liked, so it won't fit Peanut but should fit Snowflake perfectly. I used a tutorial I found online for these: http://www.thehandmadedress.blogspot.com/2012/12/diaper-tutorial-how-to-make-fitted-from.html?m=1

I plan on making several more of these to add to our cloth diaper rotation so I don't have to wash every other day.

Tuesday, February 5, 2013

Baking Bread

One thing I have committed to making myself for our family is our bread. We feel so much better when we have homemade bread and I feel at ease knowing exactly what's in it. I use out bread maker for our everyday bread, but I bake the sourdough in the oven. The sourdough is actually the easiest! I bake it in a deep baking dish and no kneading is required, just a long rise time. I made my our starter from scratch so I am really pleased with how well it has been doing.

The last photo is a kid friendly way to eat chili! Recipe from family circle magazine.

Snowflake is 13 months old now and doing well. She is very advanced in her motor and language skills compared to her sister and she is still getting plenty of momma milk! I love watching her little personality take shape!


Friday, January 25, 2013

Easy Toddler Jumper

Recently Peanut has been in need of some larger dresses. I decided to take advantage of the 99 cent simplicity pattern sale at hobby lobby and bought some new patterns and clearance fabric. I sewed up this bright jumper very quickly. The sizing was larger than I wanted but ensures she will be able to wear it for some time. I love how versatile it is- she can layer it for warmth or wear with a t-shirt in the spring/summer.

Thursday, December 20, 2012

Blogging on the go!

This blog post is being published on my iPhone! I am excited for this since I think it will help me to post more often.

Today we finished up our Christmas cookies for our friends and neighbors. Dallas had a blast licking the spoon and would also run off with a piece of cookie dough every so often. She tried to use the cookie cutters but was not very successful at it. We made no bake cookies (my first time ever making them- so easy too) and sugar cookies. We kept the sugar cookies plain since I figured there was enough sugar in them already!

Dahlia's birthday is next week - I cannot believe how fast the time has gone! We are looking forward to celebrating her first Christmas together.


Monday, September 24, 2012

Homemade Powdered Laundry Detergent

When Snowflake was just a few weeks old, she developed a nasty eczema rash. At first, we figured it might be a food allergy so I went on an elimination diet for several weeks with no luck. Then we speculated that it might be an environmental allergy to certain chemicals in her baby wash, lotion and detergent. At the time, I was using a pretty standard laundry detergent, Johnson's baby wash and Johnson's baby lotion. We threw out the lotions and baby wash and replaced it with Dr. Brommer's baby mild soap, an all natural lotion and I started using an all natural detergent. That seemed to do the trick, and her rash cleared right up!

Well, after some time using the new detergent, we ran out again and I decided to make our own and see if that works just as well. I was amazed at how easy this detergent was to make! 


1 Fels Naptha Bar Soap (or any other bar soap)
1 Cup Washing Soda
1/2 Cup Borax

Yields approx. 3 cups. Use 1 tablespoon for light loads and 2 tablespoons for heavy loads.

I don't think I will use this recipe for cloth diapers, however, since the Fels-Naptha and Borax are not good for them from what I have read (interferes with absorbency and waterproof shells). Hopefully this recipe will work well for Snowflake - I only made one batch to test it out first. I think I might use Dr. Brommer's soap next time to make sure there are no added fragrances that may irritate her skin. I plan on making a second recipe for her and Peanut's cloth diapers too as soon as I am able to go buy the additional ingredients I did not have on hand.


Monday, April 2, 2012

Simple Homemade Nursing Cover

When Peanut was still nursing, I bought a nice nursing cover from Target and loved it. It was a bit of a splurge for me, but it made nursing discretely much easier. Fast forward to now, and I am nursing Snowflake, again using the handy cover. However, about a month ago, I somehow lost it and was having a lot of trouble nursing with just a blanket since Snowflake apparently hates being covered up. After several weeks of debating whether or not I was going to shell out money for a new, I decided to make my own!


This project is so easy and I am proud of how resourceful it is! All you need is a good sized receiving blanket (which I somehow had like a bajillion of), some scrap fabric and a piece of boning (if you have any, but not necessary).

Cut 2 strips of fabric 4 inches wide for the straps. You can make these as long as you want. Fold in half, and sew along the edges, closing one end in. Then pull right sides out. Fold the raw end a few times to hide it and sew it onto the backside of cover for each strap. And that's it! I found some boning in my sewing box, so I added that in as an afterthought, but if you wanted to do it, I would sew it in first so it looks more even.

The ties are simple, but I found I never really adjusted the cover anyway, so it works for me!

Since making this cover, I have actually found my old one, but I don't think I will be going back since I like this one better! And it's nice to have a backup in case something like this happens again! I saved at least $10 making this cover myself, but since I had the boning to put in it, I saved more like $30 since those cost more. Frugal win!

Thursday, February 23, 2012

Freezer Batch Cooking

A few weeks ago, I snagged a great deal on organic milk. It was marked down 50% off to $2.99 each, which is a steal, but the "sell by" date was just a few days away. I bought 2 gallons anyway, knowing that the date is arbitrary and that I could find some good uses for it in the next week or so.

I decided against freezing the second gallon, even though it was still unopened nearly a week later. Looking back, I probably should have just frozen it, but we had fun thinking of all the ways to use it up quickly! Enter the completely unplanned and terribly long waffle and pancake freezer cooking session!

(Note to self: do not attempt something like this ever again without much forethought when you have a sick and whiny toddler and a constantly nursing newborn!)

First, I made a triple batch of pancake batter. I have one griddle. One batch made 13 pancakes. Each group of pancakes took about 6 minutes to make, give or take, depending on how closely I was watching them in between cleaning up all the batter that ended up in strange places.


This was the first group. I think I might have over-sprayed the griddle or either was temporarily attending to a toddler disaster which caused them to burn a tad (but no one notices if you just flip the pancake over and serve them the unburnt side up!)

After the marathon pancake making, which lasted almost 2 hours with all the distractions that life with 2 under 2 brings, I was exhausted and did not even want to think about freezing cooking for oh, about a year.

But the next day, the nearly bad milk was starting to mock me, so I went ahead and made a triple batch of waffle batter (but this was after I had already made one batch for breakfast that morning). I have 1 waffle maker. Each giant waffle takes about 5 or 7 minutes to make. Each batch makes 3.5 large waffles. This therefore took forever. You would think I would have learned my lesson from the pancake episode just a day ago. But I like a challenge. And now we have pancakes and waffles in the freezer ready to pop in the toaster for those mornings when I don't feel like cooking a big breakfast (which is just about every morning these days!).

But I don't think I will buy that much extra milk again. Or if I do, I will come to my senses and freeze it!

Have you done any freezer batch cooking lately?

Tuesday, November 29, 2011

Money-Saving Recipes

There are plenty of recipes for items that are more expensive to make than to buy pre-made. The trick is finding the ones that are cheaper to make at home. Pancake syrup is one of them. Pizza sauce and dough is another. Here are a few money-saving recipes our family enjoys:

Maple Syrup
Combine in saucepan:
  • 1 ¾ cup white sugar
  • ¼ cup brown sugar
  • 1 cup water
Bring to boil, cover, and cook 1 minute. Cool slightly. Add:
  • ½ teaspoon vanilla
  • ½ teaspoon maple flavoring
Cover saucepan for a few minutes as syrup cooks to melt down crystals
Store in the refrigerator.

I made this today and was surprised how easy and better tasting it was compared to the cheap store-brand syrup. I was able to whip it up while my pancakes were cooking and have it ready in a jiffy! (note: if you don't normally keep maple flavoring on hand in your pantry, I highly suggest you start. It is a relatively inexpensive ingredient that can add lots of flavor and zing to many recipes like this one.)

Pizza Dough- No Rise, No Yeast
  • 2 C Flour
  • 1 tsp salt
  • 2 tsp baking powder
  • 2/3 C water
  • 1/4 C + 2 TBSP olive Oil
  • Optional- Garlic Powder, Italian Seasoning, etc to taste
Pre heat to 425

Combine everything except for the 2 TBSP olive Oil (You can stop at this point and wrap the crust and freeze for later use)

Stretch to pizza pan, brush on the 2 TBSP olive oil (you may need more or less depending on how thick/thin you made your crust)

Bake about 5 min or so just to get a good crust going. Take out and top with your pizza toppings and continue baking from there for another 15 minutes.

This is a great recipe to have on hand for those quick, last-minute pizza nights. I'm just about full-term with this pregnancy, and don't always remember to get my dough started an hour and a half beforehand, so this was perfect! It makes a biscuit-like crust and would be perfect for calzones or pizza pockets too! I did not add the extra seasonings since we have so many in our homemade sauce as it is.

Pizza Sauce
  • 1 6oz. can tomato paste
  • 1.5 cups water
  • 1/3 cup olive oil
  • 2 cloves garlic, minced
  • salt to taste
  • ground black pepper to taste
  • 1/2 Tb. dried oregano
  • 1/2 Tb. dried basil
  • 1/2 ts. dried rosemary
Mix together water, paste and oil. Add seasonings, and mix well. Let stand 2-24 hours to let flavors blend. Store in refrigerator up to 3 weeks.

This sauce blows the stuff from the store out of the water, and it is so simple and easy to make! It really adds that pizzeria taste to homemade pizza, and after using this sauce I now truly prefer homemade pizza over many delivery types. This batch makes enough for around 3 pizzas for us. It will thicken and intensify in flavor after being stored in the fridge.


Friday, November 4, 2011

Canning Apple Butter

A little while ago, I blogged about canning grape jelly for the first time. Well, 2 days after successfully canning 12 half pints of jelly, I was ready to tackle homemade apple butter! I followed the recipe on Simply Canning, and it was just as easy as the jelly, if not easier!

I used about...
15 apples
1.5 cups of sugar
1 ts. cinnamon
1/4 ts. ground cloves
1/4 ts. salt

Step 1: Peel core and slice apples. I used my handy-dandy apple corer/peeler/slicer. It made this step super easy! I got mine at Meijer on sale for just $10!


Step 2: Fill crock-pot with apples. Top with sugar and spice mixture. Mine is 4 quarts, so you would need more apples and sugar if you have a larger crock.


Step 3: Cook on high for 1 hr just before you go to bed. I started mine at 8:30pm. Then, give it is a stir and turn it to low. Go to sleep. Wake up in the morning to this:


I did use my immersion blender to smooth out the chunks, but you could also just use a potato masher too! Next, get your canner going, then sterilize and heat jars and lids. Fill up the jars, wipe rims and screw on lids. I was able to fill 6 half pint jars with leftovers for the fridge.


Process in canner for 10 minutes. Remove and let cool for 24 hrs. Wala! Homemade canned apple butter!

This stuff is DIVINE. I am not a huge fan of apple butter normally, but that has all changed! We already went through the leftovers I stored in the fridge! Serve on warm bread or whatever you like really. Peanut particularly loves it when I make her an apple butter sandwich!

Monday, September 26, 2011

October Menu Plan

It's that time of the month again! A new month means a new menu! The theme for this month is hearty soups, stews and roasts to keep us warm while we wait to turn on the heat. Oh, and all are budget friendly of course, with the average dinner providing leftovers for lunch! For breakfast, baked oatmeal, pumpkin and apple muffins will appear and for dessert, we'll have fresh pumpkin pie and other seasonal treats.
Click here to view our October Dinner Menu.
This is the 3rd month we have begun using monthly menu plans, and I am amazed at how well it is working for us! I would definitely not be able to keep our grocery budget as low as it is without a menu plan. Planning out meals for the entire month allows me to take advantage of sales I otherwise would have overlooked. Although we are still working out the kinks with our lowered grocery budget, I know that the number one way to succeed with it is by using monthly menu plans. I have tried weekly and biweekly menu-planning, but nothing has worked as well as monthly plans have.
This month I will also be working on continuing to freeze meals and foods in preparation for the new baby. I also would like to try my hand at canning some grape jelly since grapes are so cheap right now. 
What foods are you looking forward to cooking/baking in October? Share in the comments below!

Thursday, August 11, 2011

First Summer Harvest

Today we worked on weeding our flower beds and tearing up the spent vegetable plants in the veggie garden. After some further research, we decided it would be ok to harvest what we could from it, as long as the veggie is thoroughly washed and cooked (our cat has used it as her litterbox). After harvesting a small roma tomato as well as a large yellow squash, we decided to go ahead and stake the poor tomatoes who were struggling to hold themselves up!

First harvest of August:

Successfully staked tomato plants: (note: we used existing pieces of wood laying around in the garage, so the cost of staking 8 plants was completely FREE)

Lovely La Roma tomatoes:

Nicely growing Better Boys:

Staked tomato patch from front:

Bell pepper who was previously suffocating under all the unstaked tomato vines:

Now, least you think our garden is all up and running, please take a moment and view the other side. A weedy mess indeed. The far right bed we actually completely ripped out, where the 2 squash plants previously resided. It was just not going well (lots of cat poo), and we need to restore that soil anyway. The middle bed is a project for another day, but you can see one lonely tomato plant staked in the middle. I'm not entirely sure that one will survive amongst all the grasses attempting to take over, but we'll see.

And here is our brush/compost pile after all the weeding today. You can see the remains of several ill-fated broccoli and lettuce plants:

Tuesday, June 14, 2011

Garden Progress and Harvesting Time!

It's been a while since I've updated this blog, but rest assured everyone, I am still here! About 8 weeks ago, we found out another Campbell Baby will making his or her entrance in December!! Since I suffer from rather terrible morning sickness, some things have sorta gotten thrown to the wayside. However, I am feeling a little better now that I am about to enter the 2nd trimester.

My garden pretty much got neglected the entire month of May. Terrible, I know! But we had one of the wettest springs in decades, meaning I really didn't have to water anything and some growth was stunted for a while. However, now that we've dried out, the weeds have been growing like, well, weeds! In fact, I was too embarrassed at the state of my garden to even take a picture- the vegetables were completely overtaken by those nasty intruders! A good 2 hours of weeding was required to get it back in shape, but now you can see how things are really doing.

My onions are starting to pop out! I expect in another month we will have plenty of onions for our cooking needs!


I think I was a little over-zealous with the lettuce plantings. I think we could feed the whole neighborhood with this harvest!


I really did not know what to expect from our cauliflower plants, but they turned out great! Here's a picture right before harvesting:


Beautiful cabbage heads ready for picking...

Our garden, 2 months along! (The empty space in the front bed next to the cabbage is where our radishes were. We harvested them about 3 weeks ago - they were perfect! My mom was a grateful recipient since we don't really care for radishes.)


Today I bought tomato, pepper and squash plants. I also plan on getting some zucchini, peas and beans. I can't wait for our summer harvest!!

Friday, April 15, 2011

How does your garden grow?

We've planted our first garden here at the Campbell Castle, and as the lingering spring days continue to bring more sunshine, it's been such a blessing watching it grow!

Homemade rabbit sign: Rows of radishes:


A radish seedling!
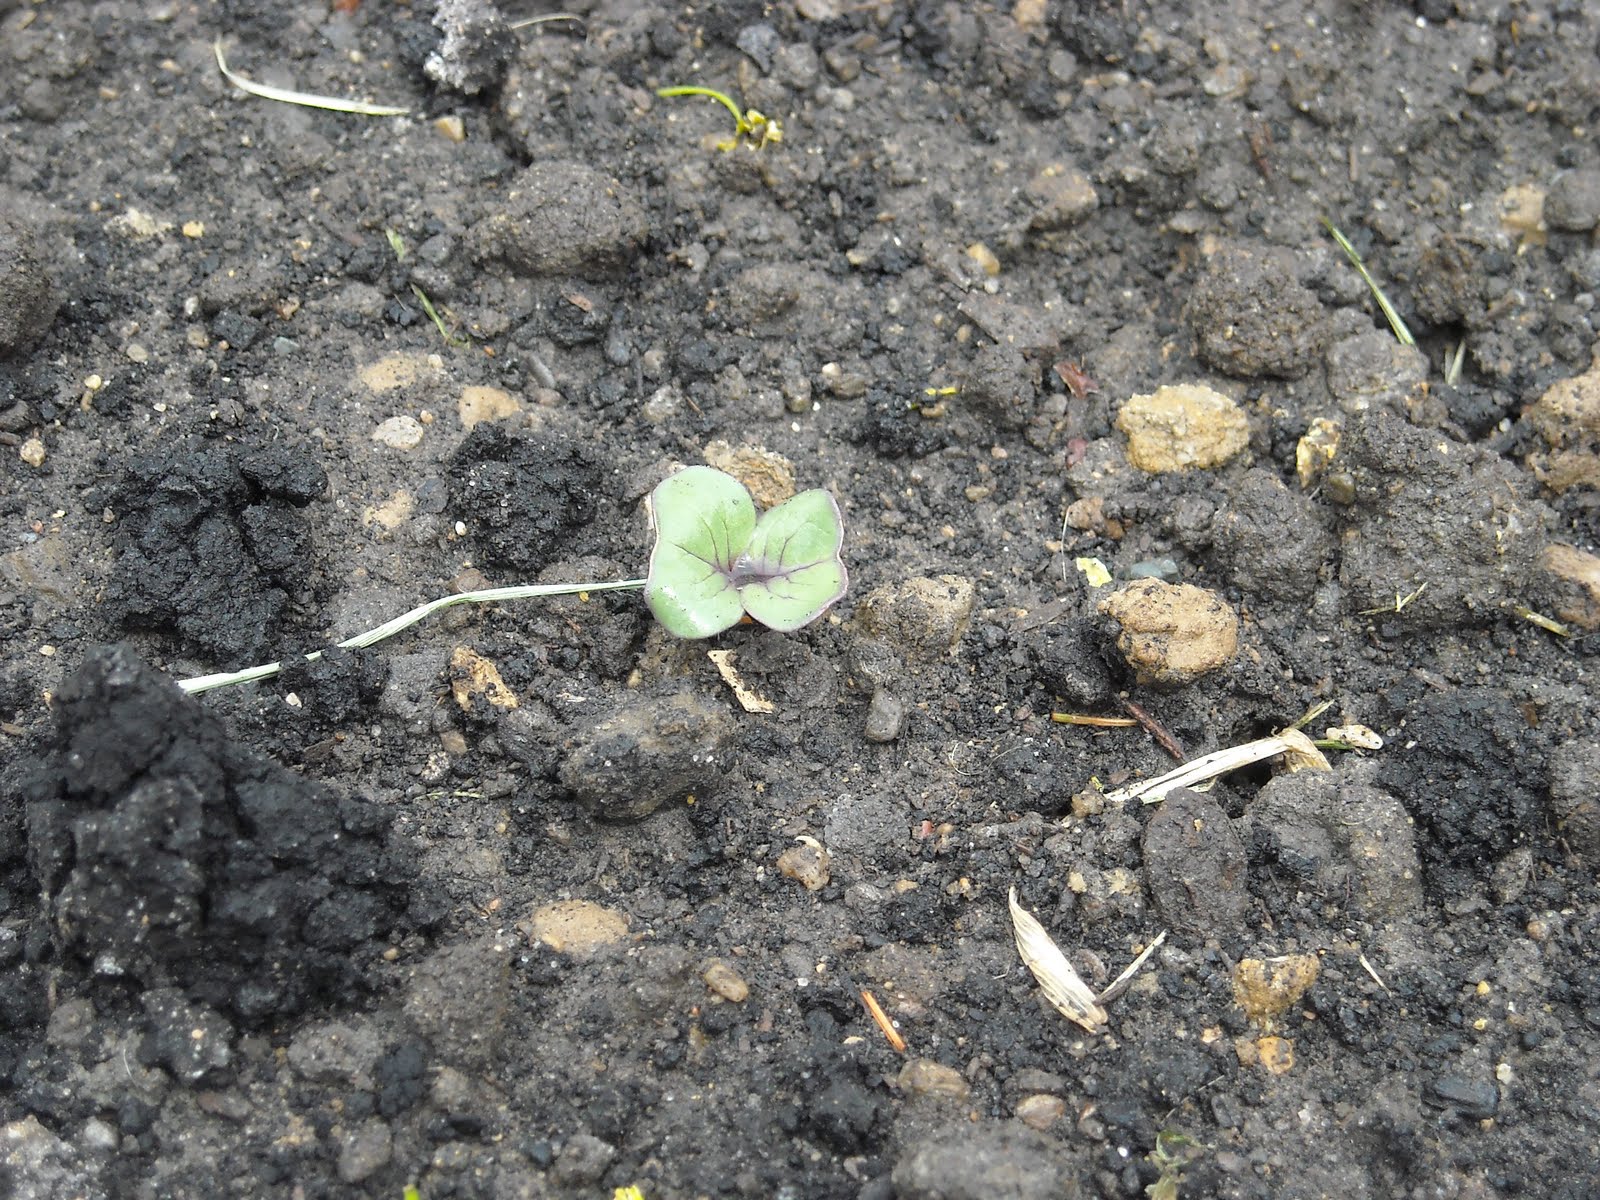


Romaine lettuce and broccoli:


Our entire 10 by 15 plot (constructed entirely of salvaged materials!): We're so excited about growing some of our own food this year, allowing us to have extra fresh organic produce on hand while saving money at the same time!


*This post is part of Frugal Gardening 101, hosted by Getting Freedom From Debt.

Friday, April 8, 2011

Back to Basics: A Lesson in Frugality

Last month we moved into our first house- an out of state move that required lots of planning and praying. God has provided for us in tremendous ways since we've been here, but one thing that has been difficult to adjust to is the temporary dip in monthly income. Daddy C was able to land a work-from-home position with his company, but the start date isn't until later this month. So we've been tiptoeing around practically everything, trying to save money and get back to the basics when it comes to practicing frugality.


It's hard to remind yourself to be cautious and do without when you're used to not worrying too much about extra unplanned purchases or little impulse buys. Going out to eat is a luxury, not a right. Cooking meals from home is the standard, as is baking your own treats.

With the rapidly rising gas prices, it's also been hard to remember to stay home as much as possible in order to stay within the gas budget. We've been walking to the park instead of driving and combining errands as much as possible. Sometimes, it takes all day when we combine 5 different things at once, but the savings make it very worth it.

We've also been using the cloth diapers during the day to help conserve the disposables we do have. It's not much effort to use them instead, but when you get used to the disposables, it does require an attitude shift!

As we started our vegetable garden, we tried to reuse as many materials as we could. The wood for the edging were all scrap pieces leftover from the previous homeowner home improvement projects. The walkways were made from spare bricks leftover from the front garden beds, and the the mulch was leftover from last season. So far, we've only had to buy extra topsoil and composted manure as well as a few transplants. To date, the total cost for our vegetable garden hasn't even topped $100, a truly frugal garden indeed!

What kind of things do you do differently when money is tight? Have any favorite frugal tips?

Wednesday, February 23, 2011

Homemade Bread

Just over a year ago, I was blessed to receive a bread maker for Christmas. I was so excited to start making bread - I thought I was going to do so much baking with it that we wouldn't need to buy store bread anymore. Well, if you've ever baked much bread before, then you probably know how ridiculous that thought was. Baking bread is sort of an art. It takes practice to really get it right. Different recipes require tweaking here and there to finally land on the one loaf that you realize you'd eat everyday with joy.

Well, After a year of baking, I think I've found it!

Two days ago, I tried out an adapted form of this recipe, and was astounded by how wonderful it was. The bread came out light enough for a sandwich and hearty enough to fill you up. It was moist and not at all crumbly, meaning slicing it was a piece of cake. It stores well for at least 3 days (although we pretty much ate all of it by then, so I wouldn't really know past 3 days!), and boasts the nicest crust I've ever tasted on completely homemade bread (not hard and crunchy like some loaves). I've already made a second loaf, and it too, is almost gone since we can't seem to stop eating it!

If you're interested in my adaptions for the recipe, here is what I did differently:
  • I skipped the soaking - I was making this bread for dinner, so I needed it quick, and not soaking the grains didn't impart any significant taste drawback! (although, soaking is much better for you, so I think I will try soaking it next time.)
  • I opted to leave out the flax seed and wheat gluten. Pretty much because I didn't have any!
  • Since I didn't soak it, I left out the extra 1/4ts. of honey and the 2 tb. of water.
  • The first loaf, I used olive oil and for the second loaf, I used coconut oil
  • I used 1 cup of bread flour instead of all WW flour. This is mainly because I was running low on WW flour. The second time, I used 1.5 cups of bread flour, because by then my WW flour had run out! The next time I bake it, I will be using all WW flour to see how it turns out.
  • The first time I baked this in bread machine, I needed it before it was "done", so I took it out about 10 minutes early. It was fantastic. The second time, I let it continue baking throughout the cycle, and it was just as good, albeit a bit more dense and not as moist.

There ya have it! I guess that is quite a bit of adaption now that I think about it. I tend to do this a lot these days - just winging it in the kitchen throwing things together! I find I'm actually to the point where I can begin creating my own recipes based on the cookery knowledge I already have - such a great feeling.

Do you have a favorite from-scratch homemade bread?

Tuesday, January 25, 2011

Food for Baby

Now that Peanut has been eating more solids, I've begun making my own baby food for her. Check out my post over at my food blog, No Preservatives Added, on Homemade Baby Food!
(Oh, and she also enjoys a bit of table food too! Whatever Mommy C and Daddy C are eating seems look good to her, haha!)

Monday, January 3, 2011

Homemade Baby Quilt

I finally finished Dallas' baby quilt! The one I began, oh, way back in 2000 of 9. That's 15 months if anyone is counting... 15 months of procrastination! I win an award for this one - I sewed the last seam on Christmas Eve evening, just in time to place it under the tree for the next day. I have to say, I have never been prouder of my sewing abilities! Of course, it is very much handmade, which you can tell by the sloppy edges (which, I did try really hard at getting straight, mind you!), but I love it.

All this sewing has got me dreaming up the next project I'll tackle - an infant car-seat cover! I will be sure to update on how it turns out!

And if anyone is interested, I followed these easy steps from the Life: Frugal and Simple how-to video.